Lesson 9: Adding Interactivity with Overlays
A solid layout and great graphics are a good start, but interactivity will help your website or app engage viewers. In this lesson, Keith Gilbert will help you take designs to the next level.
Expert Contributors to this lesson

Keith Gilbert
Estimated time for lesson
Today’s lesson should take approximately 20 minutes.
Today's Course Outline
- Slideshows
- Image Sequence
- Scrollable Frame
- Pan & Zoom
- Web Content
- Video Demo
Be sure to watch the video at the end to see all of the interactivity in action.
Introduction
In addition to supporting multi-state objects, buttons and forms, hyperlinks, and the animation and timing panels, in5 also supports interactive DPS “overlays” (now called Widget in in5).
DPS was Adobe's Digital Publishing Solution/Suite.
DPS no longer exists, but in5 supports all the functionality from those original panels, and has expanded on them.
Important note
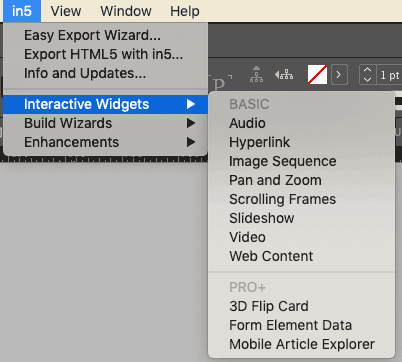
As of in5 v3.3, you no longer need to install the Overlays panel. in5 comes with it's own replacements found under in5 > Interactive Widgets.
These panels will let you create additional interactivity from InDesign that you cannot create any other way.
Keep reading, and I’ll show you how.
Slideshows
Slideshows can be created with just a combination of multi-state objects and buttons, as explained in another tutorial. But the Slideshow overlay/widget adds some additional capabilities to slideshows.
To create a slideshow overlay, just select a multi-state object with the Selection tool, and open in5 > Interactive Widgets > Slideshow (or click Slideshow in the Overlays panel).
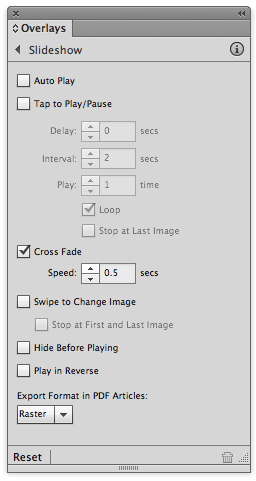
Auto Play
If you select this option, the slideshow will begin to play automatically when it appears on the screen. This can be used not only for slideshows, but for creating very simple, low-frame-rate animation. When this option is selected, the Delay, Interval, Play, Loop, and Stop at Last image options become available.
Tap to play/pause
This allows the user to tap the slideshow to cause it to begin playing, or to pause the playback.
Cross Fade
This can be set to any value between .125 and 60 seconds. This is how quickly a slide transitions into the next slide. Slideshows created without the Overlays panel have no transition between slides. Setting a transition speed of .5 seconds or so provides for a nice fluid movement between slides.
Creating Slideshows with the Overlays panel lets you crossfade images
Swipe to change image
This allows the user to swipe to navigate from image to image in the slideshow.
Note: The Export Format in PDF Articles setting has no affect on in5 output.
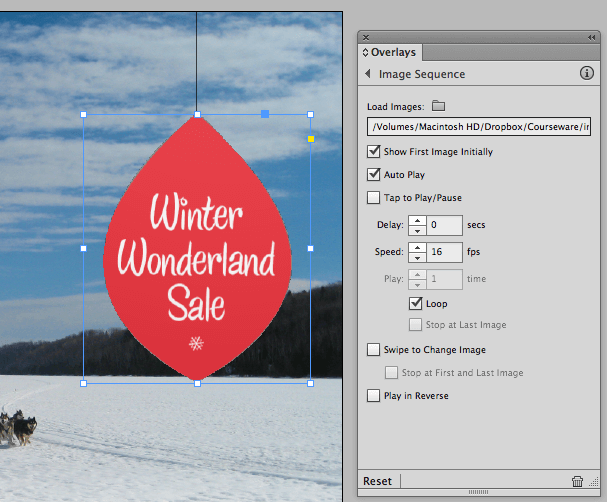
Image sequence
Image sequences are extremely versatile, and very useful. An image sequence is simply a series of two or more jpeg or png images that can be set to either play automatically, or play as the user scrubs across a frame.
Image sequences can be used to:
- Play smooth animation
- Allow fluid user interaction with a group of images. For example, a subject can be placed on a turntable, and then be photographed every 5° or so as it spins. Each image is then saved as a jpeg. As the user swipes across the image sequence, they can then “spin” the image.
- Create animated or video effects with a transparent background, since each png image can have a transparent background.
To create an image sequence:
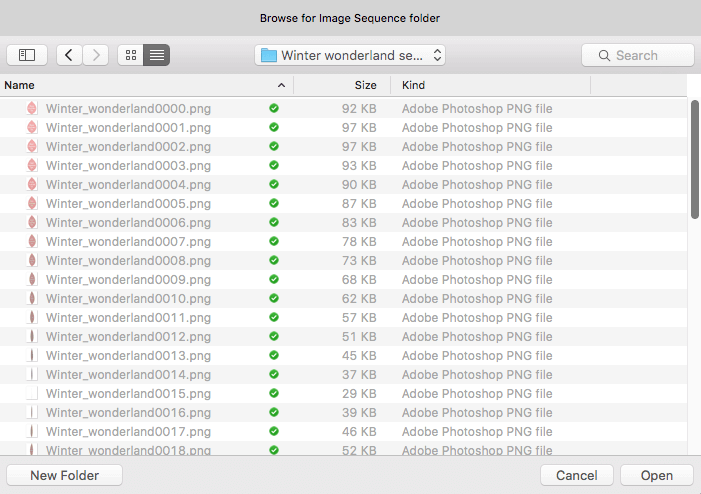
- Create a series of jpeg or png images. Some tips for creating the images:
- Photoshop, After Effects, and Adobe Animate are some of the tools in Creative Cloud that can output a series of numbered jpeg or png images from video or animated content.
- The images must be numbered sequentially with the same number of digits, e.g., file001.png, file002.png, file003.png, etc.
- Save images as compressed JPG images, with as much compression as possible while still achieving the quality you desire. Use 24 bit PNG format if your images must have a transparent background.
- Use the fewest number of images you can get by with while still achieving a smooth sequence.
- Draw a frame on your InDesign page. The size of the frame doesn’t matter. It will be automatically resized to fit your image sequence content in the next step.
- With the frame you just drew selected, open in5 > Interactive Widgets > Image Sequence (or choose Image Sequence in the Overlays panel).
- Click the folder icon next to Load Images, locate the folder containing your jpeg or png images, and open it.
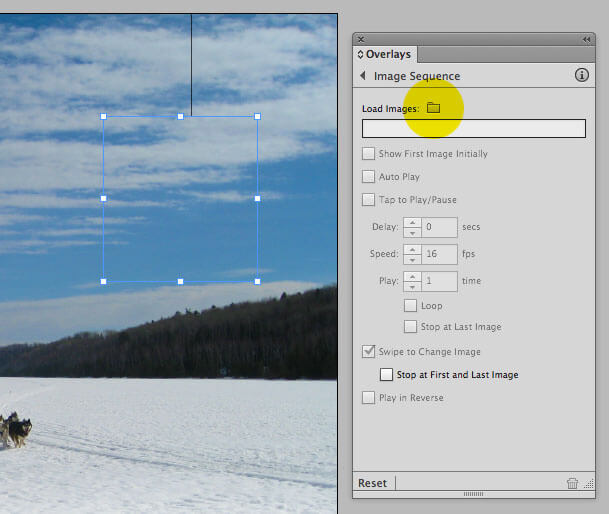
- Position the image where you want it on the screen.
- Set the options in the Overlays panel as desired. More information about these options can be found here.
Scrollable frame
The Scrollable Frame overlay is an easy way to add text that scrolls within a frame to an in5 page. And, this type of object is quite versatile and useful.
- Create the text that you want to scroll, in a long text frame. The text must not be overset in the frame. You may need to increase the size of the pasteboard in InDesign’s Preferences to accommodate the long frame.
- Create a second frame that will be the “container” frame that the text is going to scroll within. This frame may have a background color, stroke, transparency, etc.
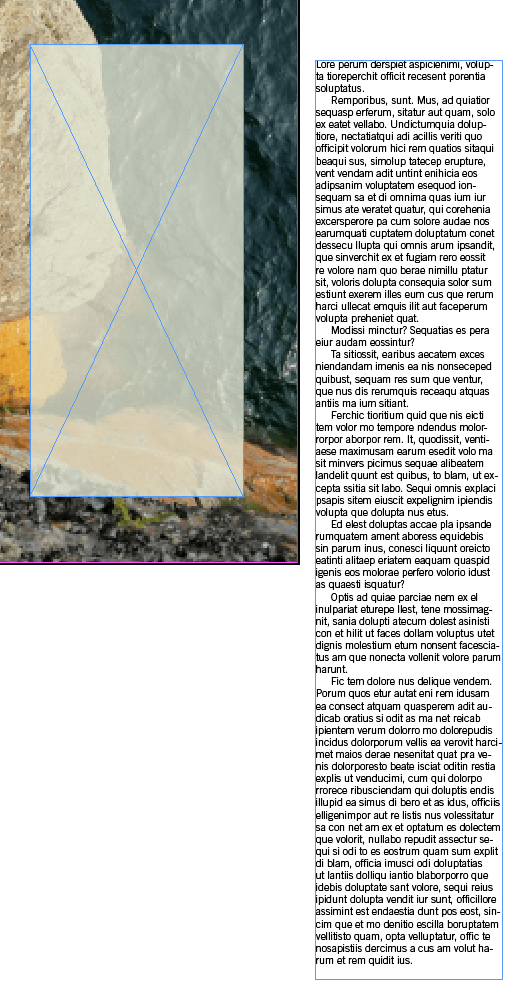
- Position the text frame over the container frame where you want it to be positioned at the start.
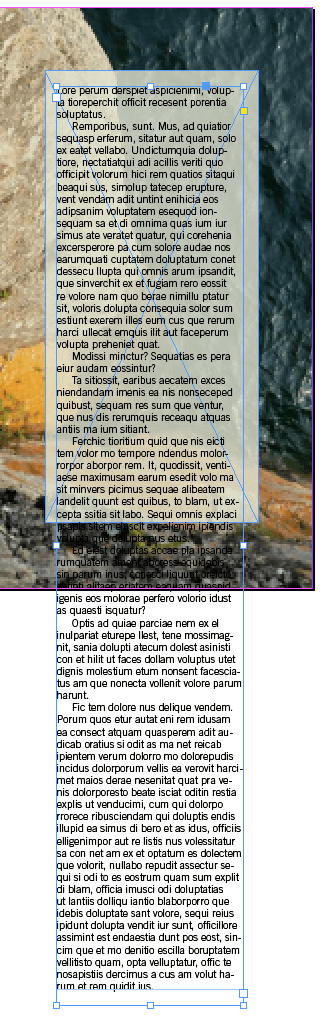
- Cut the text frame (Edit > Cut).
- Select the container frame, and choose Edit > Paste Into.
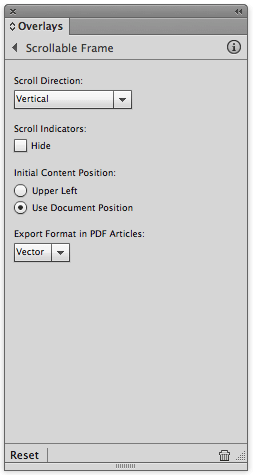
- With the container frame selected, in5 > Interactive Widgets > Scrolling Frame (or choose Scrollable Frame in the Overlays panel).
- Set the Scrollable Frame options as shown below.
With a little ingenuity, this same technique can be used to create an infinite variety of “tabs” or “drawers” that pull out from the top, bottom, left, or right sides of the screen.


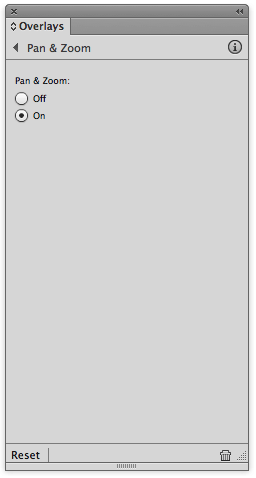
Pan & Zoom
The Pan & Zoom overlay is simple to create. Just place an image on the page, select the frame, choose in5 > Interactive Widgets > Pan and Zoom (or Pan & Zoom from the Overlays panel), and turn Pan & Zoom On.
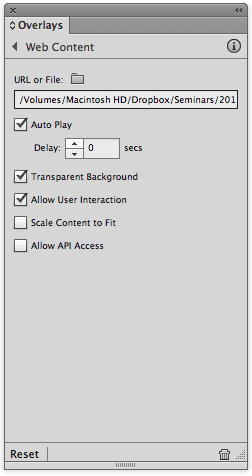
Web content
In5 supports Web Content overlays. These are frames that either contain local HTML/CSS/JavaScript content, or embedded HTML content for widgets such as maps.
To create a Web Content overlay with local HTML content that is stored on your hard drive or file server:
- Create some HTML/CSS/JavaScript content using whatever tools you choose, and save it into a folder by itself.
- Draw a frame on the page, and with the frame selected, choose in5 > Interactive Widgets > Slideshow (or Web Content in the Overlays panel).
- Click the folder icon next to URL or File: and select the index.html file in the folder that contains your HTML/CSS/JavaScript folder. Fill in the panel options as show below.
Alternatively, if your source application (e.g., Adobe Animate or Tumult Hype) creates an OAM file, you can simply use File > Place to insert your content. You don't even need the Overlays panel installed to use this method.
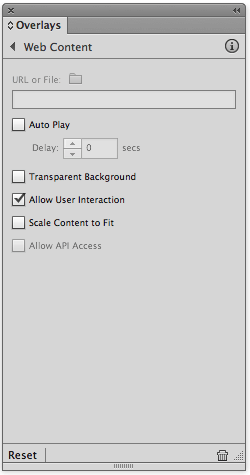
To create a Web Content overlay with Web-based content using a widget that generates iFrame code, such as a map:
- Using a site such as Bing maps, generate an "embed code" at the appropriate dimensions for your page. Copy this embed code to the clipboard.
- In InDesign, choose Object > Insert HTML
- In the dialog box that appears, paste in your embed code, and click OK.
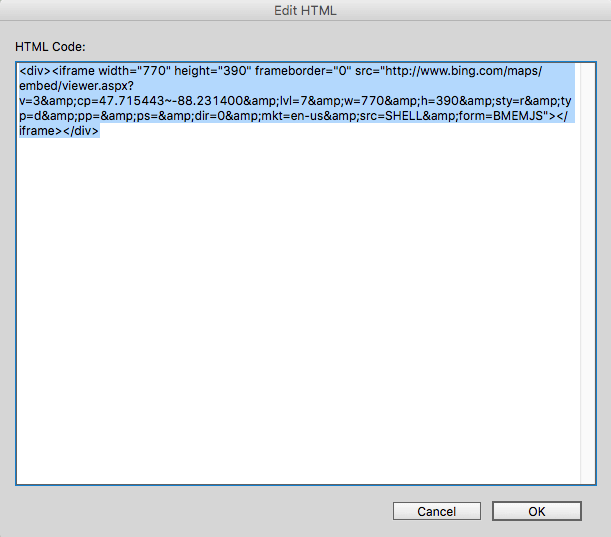
- Resize the frame, if necessary, to match the iframe dimensions (in the example above, 770 x 390 pixels)
- Choose in5 > Interactive Widgets > Web Content (or Web Content in the Overlays panel). Fill in the panel options as show below.
So if you are looking for ways to include meaningful interaction in your projects, don’t overlook the refinements to slideshows that are made possible with the Overlays panel, as well as the entirely unique Image Sequence, Scrollable Frame, and Web Content interactivity made possible with this panel.
More Interactive Widgets
In addition to recreating the DPS Overlays options, in5 also adds several tools for creating interactive content, including
- 3D Flip Card - 3D interactivity with a just a click.
- Form Element Data - control form elements and save data locally.
- Mobile Article Explorer - create a mobile-friendly reading environment while maintaining your pixel-perfect design.
Video Demo
Check out this video demonstrating all of the Overlays on an iPad.