Lesson 4: Adding Audio & Video
A guide to enhancing your publishing projects with rich media
Whether it’s an ebook, a web page, an app, nothing makes a publishing project come alive more than rich media like audio and video. And although InDesign was created as a page layout tool for print production, it has long supported the placement of audio and video files. Even better: you can include audio and video your interactive files. So let's take a look at how to work with audio and video in your InDesign files.
Expert Contributors to this lesson

Mike Rankin
Estimated time for lesson
Today’s lesson should take approximately 20 minutes.
Today's Course Outline
- Media File Formats
- Keeping File Size Down
- Placing Audio and Video
- Using InDesign’s Media Panel Controls
- Special cases: Streaming Video, YouTube, Animated GIFs and More
Media File Formats
While InDesign does support various formats for placing audio and video, it’s relatively simple to choose the best ones for maximum compatibility. For audio, you should use MP3 format. For video, use H.264-encoded MP4 files. These are fully supported within InDesign, so you can use all the controls in the Media panel, and they’re supported on Apple’s iOS devices, so your video can be viewed on an iPhone or iPad.
If you have to convert an audio file to MP3 from another format, you can use iTunes or Adobe’s Media Encoder (which comes with a Creative Cloud subscription). If you need to convert to MP4 from another format, you can use Adobe’s Media Encoder application.
You can also get good results for free with the Open Source application Handbrake, which allows you to choose a different format, crop video, and select a different aspect ratio, frame rate, and compression level.
Backup formats
Since different web browsers support different audio and video formats, in5 also has a fallback mechanism that checks for audio files with the same name but a different extension to include as alternate sources. If those files are found during export, they're included in the output and the proper fallback code is baked into the HTML.
Backup video formats include
- webm
- ogg
- ogv
Backup audio formats include
- mp3
- ogg
- wav
Every modern browser now supports mp4 and mp3 natively, so you shouldn't need to worry about backup formats.
Keeping File Size Down
Along with choosing the right file format, another best practice is to try and keep the file size to a minimum. Before you place your video into InDesign, trim it to the exact length you want, and choose a size (in pixel dimensions) that’s appropriate for your project. Common sizes like 400 x 300 and 640 x 360 often work well. Or, if you’re planning to publish to the iPad and you want fullscreen video, make it 1024 pixels wide.
Overall, you should try to balance file size vs. quality so your video looks good and loads quickly.
Placing Audio and Video
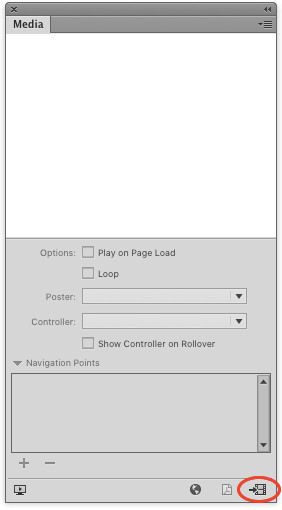
To place audio and video files into your InDesign layout, you can use the same methods you use to place static images or text files: you can choose File > Place, or simply drag and drop the media files from the Finder or Explorer. You can also use the button at the bottom of Media panel (Window > Interactive > Media).
Note that unlike static images and text files, choosing Show Import Options in the Place dialog box won’t give you extra controls when you place audio and video.
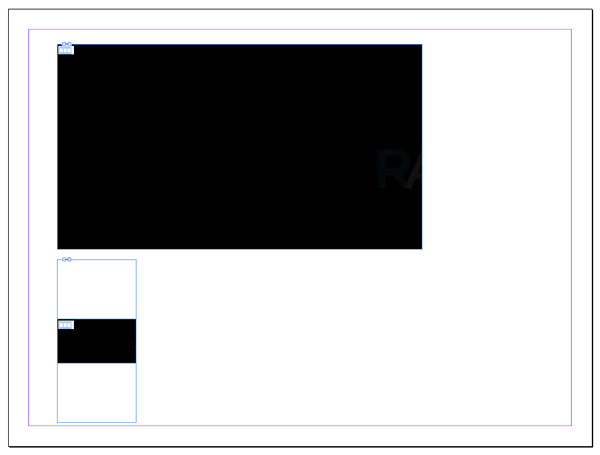
With a video file selected and the place gun loaded, if you click to place a video file, InDesign will place it at full size.
If you drag to define a frame, the video will be sized to fit entirely within the frame.
While you can resize the frame containing a video in InDesign, any cropping will be ignored when you export the file, and the whole video will be visible.
Audio can placed into your document using the same methods described for video.
The size of the frame you create for an audio file is relevant in two ways:
- It allows you to control the size of the area users can click to play the sound.
- It defines the size of the poster, which is the static image that appears before the media file is played.
Using InDesign’s Media Panel Controls
Once you have placed a video, you can use the Media panel controls to set its appearance and behavior.
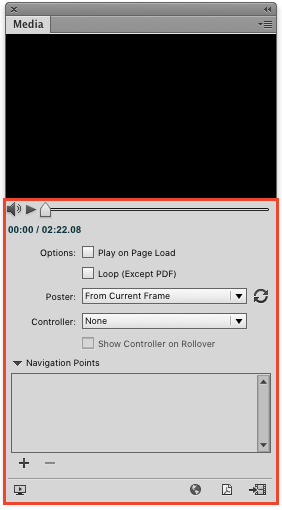
With a video selected in the layout, you can see a playable preview at the top of the Media panel. The controls allow you to play/pause and mute/unmute.
You can also drag the playhead to a specific point in the video, as indicated by the time display. And there are options to make the video start playing when the page is viewed, and to have it loop so it plays continuously.
When you first place a video it is represented on the page by whatever content is in the first frame of the video. This is called the poster, and you can also control the posters of placed audio files.
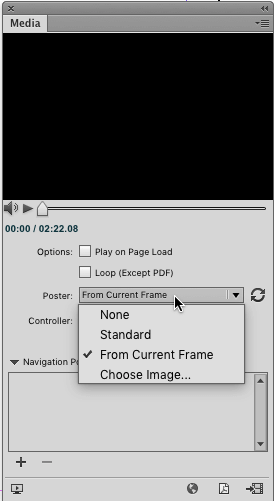
To change the poster, choose from the Poster pop-up menu.
- None will make the video invisible until it is played.
- Standard uses a generic JPG image found in your InDesign application folder (which you can replace with a file of your own—just name it the same as the original standard poster file).
- Current Frame allows you to choose any frame from the video preview as a poster.
- Choose Image opens a dialog box where you can choose any image on your computer for a poster.
Next, you have a menu with options for choosing a controller that will appear in output.
This can be done with in5 from the Video widget (in5 > Interactive Widgets).
in5 supports 3 skins.
- None - Hides all user interface for the video
- Big Play Button, no controller - Shows only a large play button
- Full controller - Shows all the options (play, stop, seek, mute, fullscreen, etc).
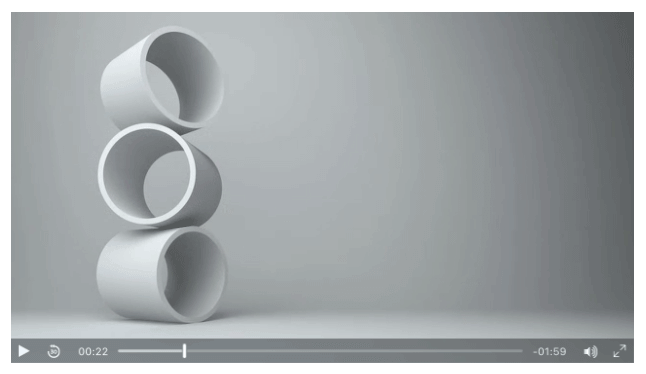
The image above shows the full controller.
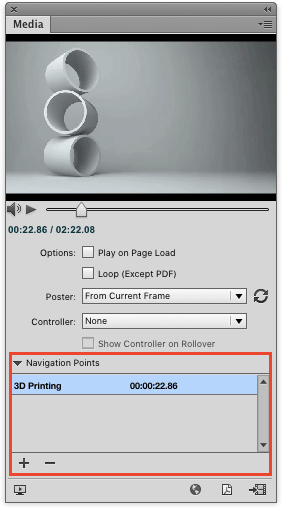
Another thing you can do in the Media panel is to set navigation points in the video that a viewer can jump to instantly by clicking a button.
Jump to video navigation points on an interactive site or app with InDesign!
To create a navigation point
- Drag the playhead to the point you want (sometimes this is easier said than done as the playhead snaps mysteriously to certain points in the video), then
- click the plus sign (+) to add a navigation point, and give it a descriptive name.
Then, in order for a viewer to play the video from that point you have to create a button using InDesign’s Buttons and Forms panel (Window > Interactive > Buttons and Forms).
For the button action, choose Video, and then select the appropriate video file, option, and navigation point.
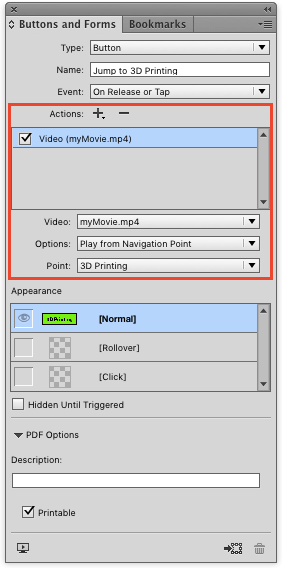
Note that InDesign 2021 was initially missing the internal hooks for navigation points, so in5 could export them. The InDesign team has since fixed this. Update to InDesign 16.2.1 or newer if you have issues exporting navigation points in InDesign 2021.
(Buttons will be covered in more detail in another lesson).
At the bottom of the Media panel, you also have a set of PDF Options. These are not used with HTML output.
Captions, Scaling, and more
The Video widget (found under in5 > Interactive Widgets) lets you customize video even further with
- Captions/subtitles
- Scaling options for video
- Mute on start (to enable autoplay in all browsers)
- Trigger an action when the video finishes
You can see all those options in the video below.
Special cases: Streaming Video, YouTube, Animated GIFs and More
Let’s also consider some cases where you don’t want to embed the video in your file, or when you want to use an alternative to video like an animated GIF.
Streaming Videos
At the bottom of the Media panel is a button that looks like a globe.
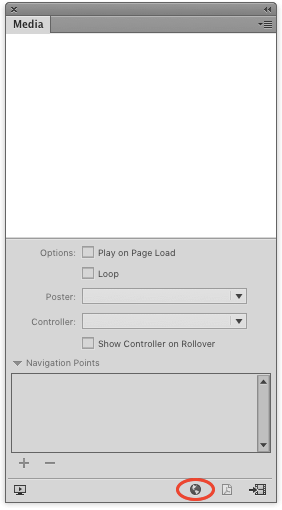
When you have a frame selected in your layout, clicking this button opens a dialog box.
Inside the dialog box, you can enter the URL of a video that you want to allow users to stream from within your document.
Obviously, for this to work the user must have an active internet connection.
Embedding YouTube and other services
You can also place YouTube videos in your interactive documents.
To insert a YouTube video, grab the embed code from a YouTube video.
Within Youtube
- Click the Share button below the video.
- Click the Embed tab.
- Click Show More to adjust sizing, controls, etc (optional).
- Copy the HTML code.
Next you can place the embed code into InDesign by
- Pasting from your clipboard (Edit > Paste)—InDesign will automatically recognize the clipboard content as HTML—or
- choosing Object > Insert HTML...
You can always edit the embed code later by selecting the object and right-clicking (or choosing Object) > Edit HTML...
Animated GIFs
You can place animated GIFs into your InDesign documents just like static images and in5 will include them in the output (just be sure not to crop them, otherwise in5 will think you want the image re-rendered).
More Moving Image Options
You can also create self-running slideshows and image sequences. Those will be covered in the lesson on Overlays.
Take Aways
- Adding audio and video is easy with InDesign.
- Remember to start with the right file formats (MP4 and MP3 in most cases), trim and size the video appropriately.
- Take advantage of controls in the Media panel to customize the poster, controls, and navigation points if desired.
- No matter what, be sure to test your documents using the software and hardware that you expect your users to have, so you know exactly what they’ll see and hear in your published files.
For more on adding interactivity to InDesign, check out Mike's InDesign CC: Interactive Document Fundamentals course on Linkedin Learning.


