Lesson 8: Creating Dynamic Content with Multi-State Objects
Multi-state objects are among the most powerful interactive features in InDesign. They can be used for anything as simple as a slide show all the way to combining multiple full pages into a single object to allow a user to view multiple pages while navigating with buttons.
Expert Contributors to this lesson

Bob Levine
Estimated time for lesson
Today’s lesson should take approximately 15 minutes.
Today's Course Outline
- Creating Object States
- Navigating States with Buttons
- Previewing Object States
- Tips for managing and working with MSOs
What is a Multi-state Object?
Originally intended for SWF output, multi-state objects can now be used in DPS and Fixed Layout EPUB, and in5 HTML5.
So, what exactly is a multi-state object? It’s an InDesign object that by definition has multiple possible appearances.
They can be used for anything as simple as a slide show up to combining multiple full pages into one to allow a user to view multiple pages while navigating with buttons.
In this lesson, we'll create a simple slideshow.
Creating Object States
In the screenshot below you can see that I have four objects on the page. I’d like to turn this into a slideshow so I select them all.
(As an aside here, for fixed layout EPUB or DPS purposes I like to set the page up as 1024x768 with the intent as Digital Publishing).
In most cases for a slideshow like this, you’d use the align panel to have all of the objects in the same position but that’s not required. I’ll leave them where they are.
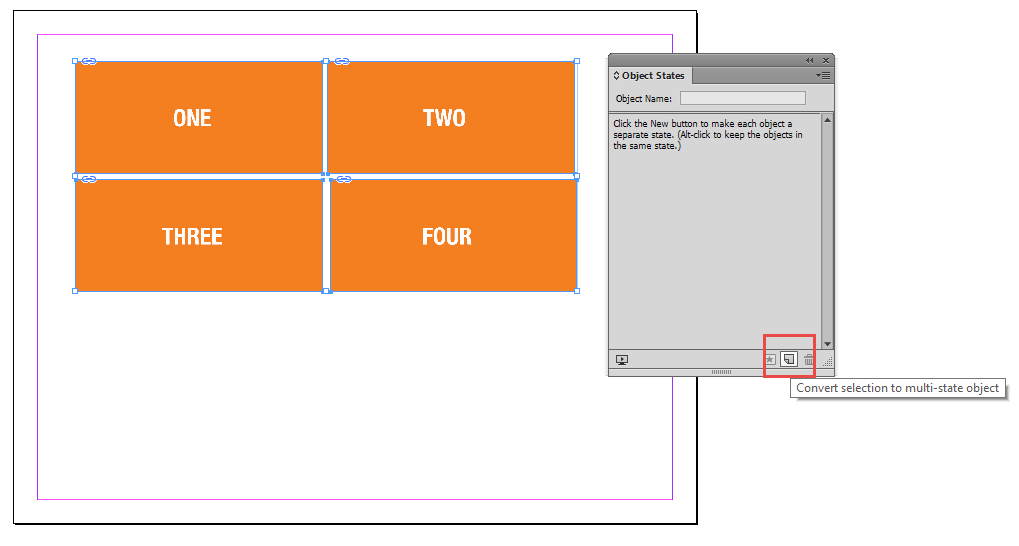
The Convert selection to multi-state object button is now active.
Clicking that button will create the MSO and thumbnails of the states will appear in the Object States panel.
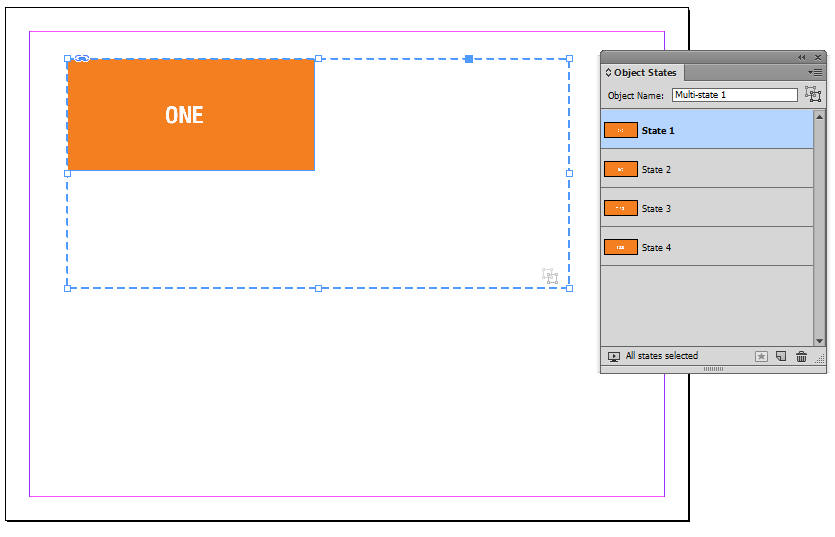
On first blush it appears that that the three of the objects have disappeared, but looking at the Object States panel shows them as individual states. Clicking on any one of them makes it the active state.
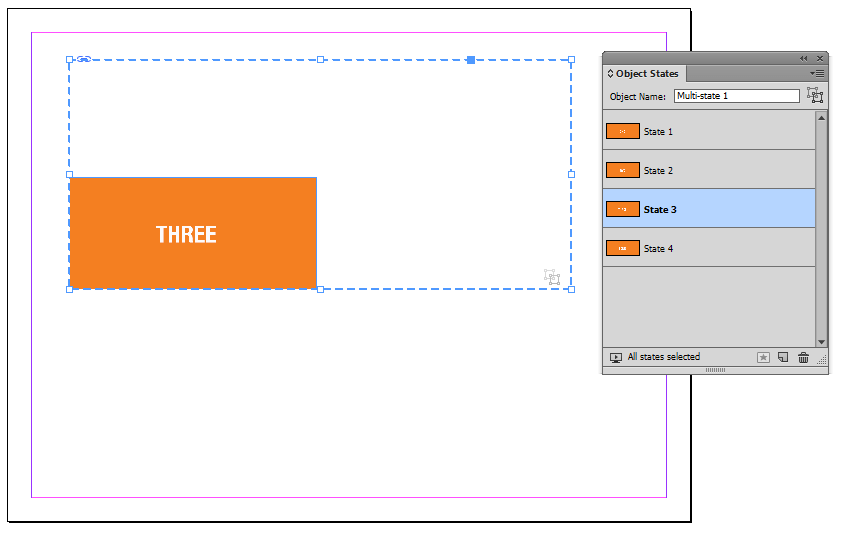
Now that we’ve created the MSO we need a way to navigate through the various states. We’ll do this by creating buttons.
Navigating States with Buttons
There are two ways we can handle this.
- The first is to create a button for each state and apply the go to state action.
- The second, and simpler method for this type of slideshow is to use the go to next state and go to previous state actions.
We’ll start out by creating a couple arrows (but you can use anything for a button) and selecting them both. With both still selected open the buttons and forms panel (if not already open, it’s under the Window > Interactive > Buttons and forms menu) and click on Convert to Button at the bottom of the panel.
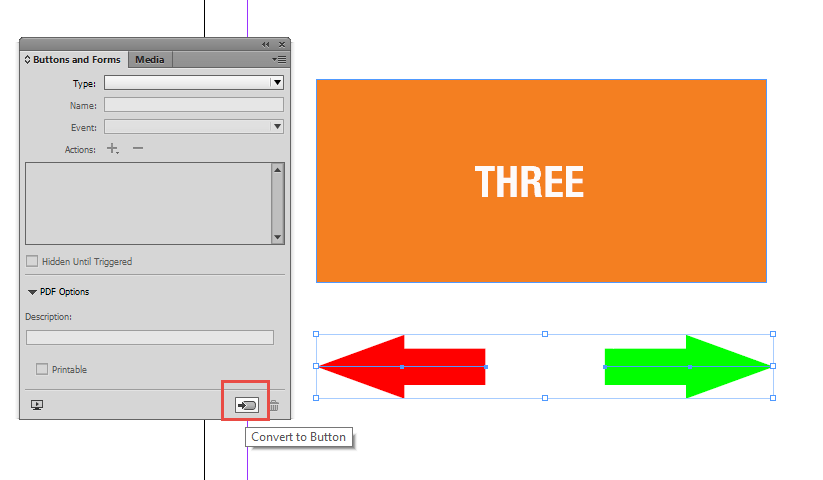
Buttons have a distinct thick dashed border around them so they’re very easy to see.
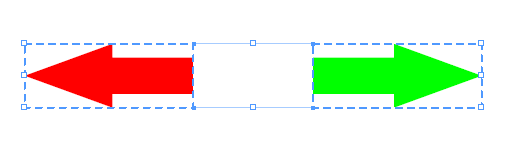
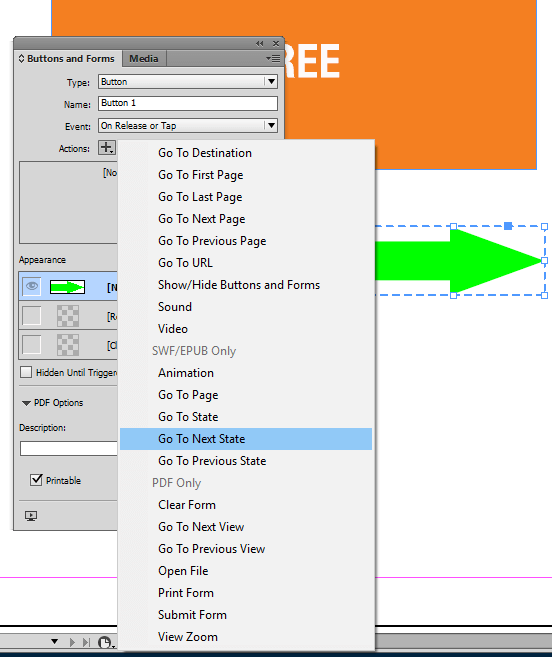
Select the right arrow (InDesign will not allow for actions to be assigned to multiple buttons at the same time) and from the Buttons and Forms panel click the plus sign (+) in the Actions section.
Choose Go To Next State. At this point, if you’d like you change the name of the button, but you don’t have to, but do not change the Event. Leave it at On Release or Tap.
Do the same for the left arrow but choose Go To Previous State.
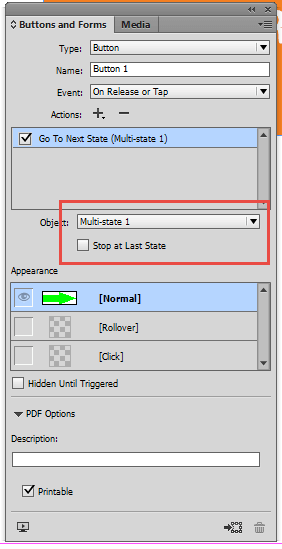
You’ll notice when doing so that the panel changes to allow you to choose which MSO these actions will apply to (in this case there’s only one to choose) and, since you’re using go to next and previous actions, the capability to stop at the last state is added.
This is optional and will depend on user experience you want.
For more on creating buttons to control MSOs, check out this video on creating a slideshow.
With that, we’re ready to test the MSO.
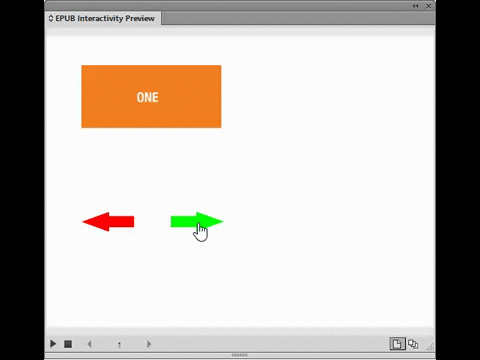
Previewing Object States
The easiest way is to launch the EPUB Interactivity Preview panel, found under Window > Interactivity.
That’s it for this simple demo. But, it’s just the tip of the iceberg for MSOs.
Each object state can contain virtually anything. There’s no limit to the number of objects or depending on output, interactivity.
There's no limit to the interactivity that you can create with MSOsFor EPUB or through the use of in5, even native InDesign animations are supported.
Tips for managing and working with MSOs
These tips will help you to work with MSOs in your documents.
How to add a state to an existing MSO
- Select the object and the MSO.
- Click the new button in the Object States panel.
If you have multiple objects selected and want them all in the same state, then alt/opt-click the new button.
Know what you have selected
There are visual cues in the Object States panel to tell you what is selected.
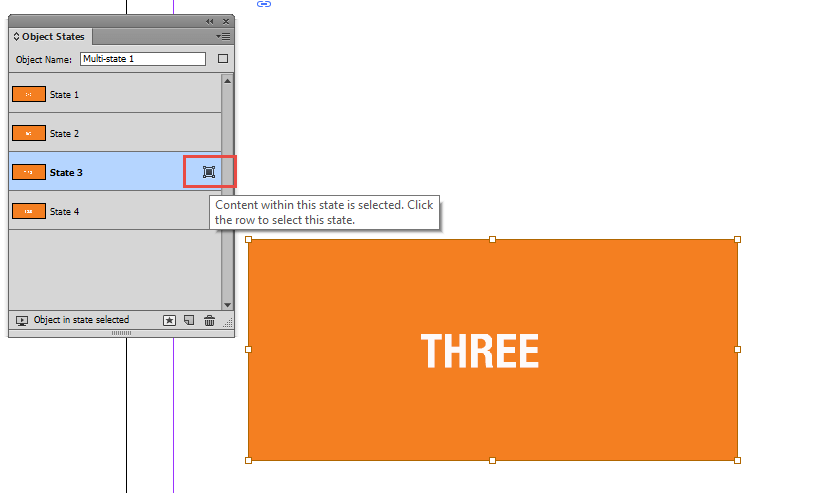
In the image above, the content is selected.
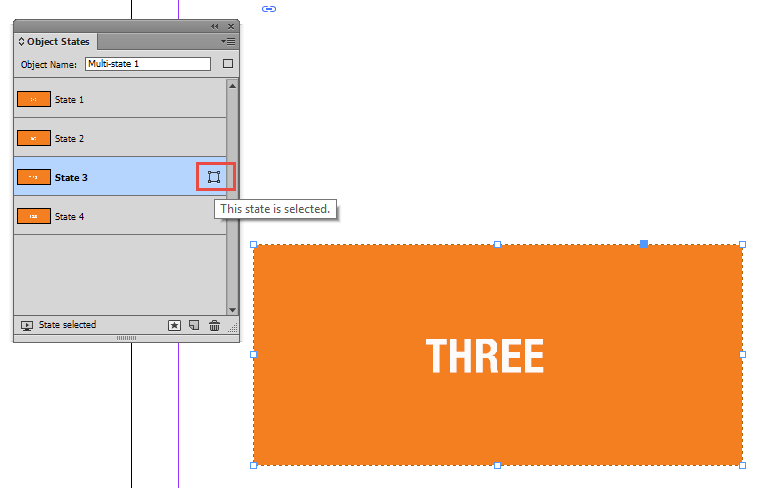
In the image above, the state selected.
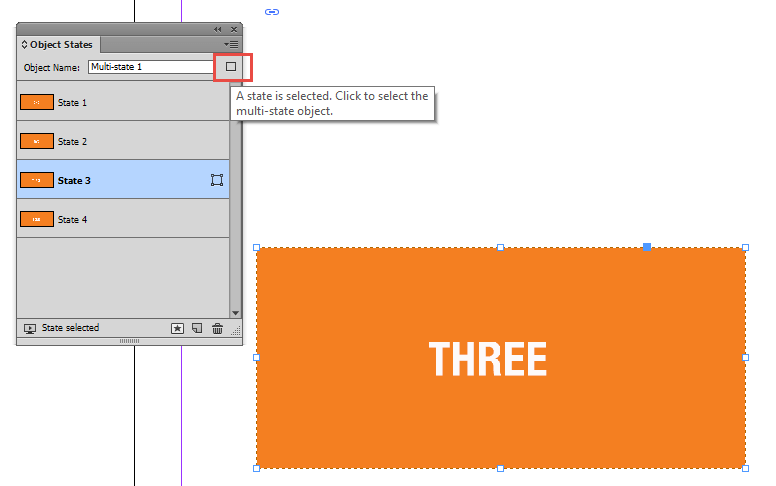
You can easily select the MSO by clicking the icon next to the Object Name.
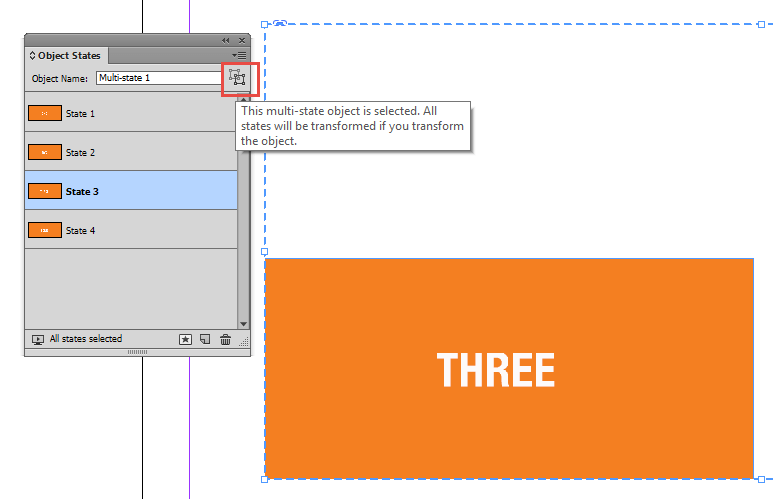
In the image above, the MSO is now selected.
How to Add an object or objects to an existing state
Once you've created an MSO, you may want to make additions or alterations.
To add an object to an existing state:
- Click the state you want to add to in the Object States panel to make it the active state.
- Click the Add objects to visible state button (shown in the image below).
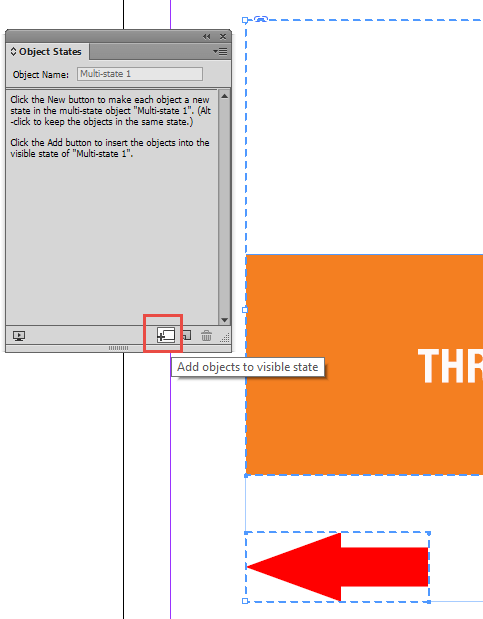
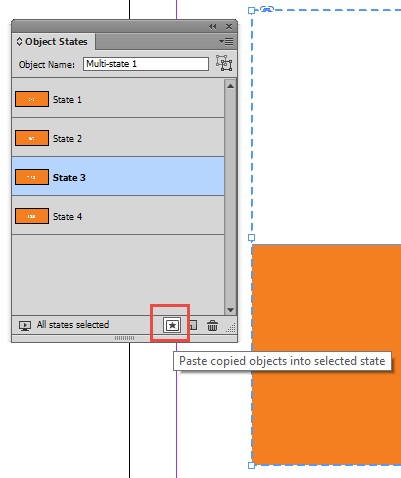
That button is contextual. If you have an MSO selected and an object on the pasteboard, it will allow you to paste the contents into the selected state (shown in the image below).
Adding buttons to a state
Buttons can also be added to an MSO. Be aware that adding a button with a go to state action to an MSO will cause the action to be lost and you’ll need to reselect the button to add the action back once its been moved into the MSO.
Take Aways
- Overlays let you quickly add sophisticated interactions.
- An MSO can become a slideshow with a couple of clicks.
- A Scrolling Frame is just a simple copy and paste away.
- You can load live content from other sites into your site or app.
Want to learn more about the power of MSOs? Check out Laurie Ruhlin's Creating Your First Document course on Ajar Academy


